


How to series
How to install a sliding window
Sleek, durable and space saving, sliding windows are a common inclusion in many homes. Their design encourages air flow and suits a variety of spaces.
Correct installation of all windows and doors is critical to ensure they operate as they should, without any headaches, for many years to come.
Installing your aluminium sliding windows is a simple process; follow this step by step guide to ensure correct installation.
Please note, A&L’s aluminium sliding windows have been used for this How To. If your sliding windows were not manufactured by A&L, please ensure you consult the manufacturer’s product and installation information to ensure correct installation of your specific product.
Before you begin.
As every site is different, be sure you have the correct safety gear for the site you’re working in and the tools you’ll be using. Please note that this article is a guide only, so we recommend relevant considerations be made to suit your project’s unique requirements. This article references A&L’s sliding windows; if you are not installing A&L brand windows we recommend referring to the manufacturer’s manual to ensure correct installation of your specific products.
The tools you’ll need.
To install your sliding window, you’ll need to get hands on with the following tools:
- Drill with 3mm bit that is used for pre-drilling the fixing holes
- Fixing nails or screws that are suitable to your specific installation
- Spirit level
- Tape measure
- Hammer
- Packers
- Mini pinch bar
- Flat head screw driver
- Staple gun and staples (if flashing is used)
- A friend/second pair of hands depending on size and weight of the product
How to install a sliding window – the steps:
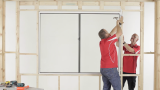
Follow our How To Install an A&L Sliding Window video tutorial, or the steps and instructional images below to correctly install your sliding windows.
- Before beginning the installation, measure the height, width and depth of the product and that of the opening you are installing into.

- The size of the opening needs to be 20mm wider and 30mm higher than the product to allow a square and plumb installation.
- The overall depth of the product needs to match the cladding type it is being installed into. This will have been determined when the product was ordered, but it never hurts to check twice.
- You will need to determine the flashing type required.
- We offer a range of standard flashings, but it is up to the builder to decide how to make the building water tight.
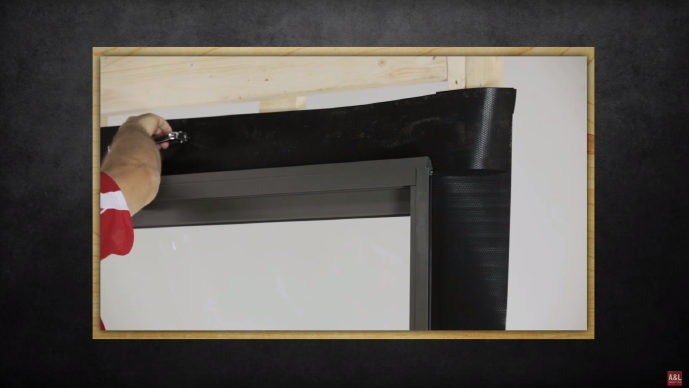
- Flashing needs to be pulled forward and fixed to the face of the stud. This can be done using a simple staple gun.
- Finally, it’s a good idea to double check if any special installation requirements apply to the product you’re installing. These could include:
- Specific head heights
- Special finishing details; or
- Coupling to other products.
- Once all the cross checking is complete, it’s time to begin the installation.
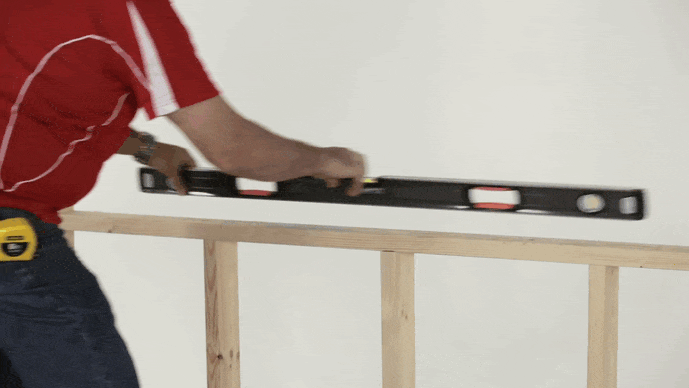
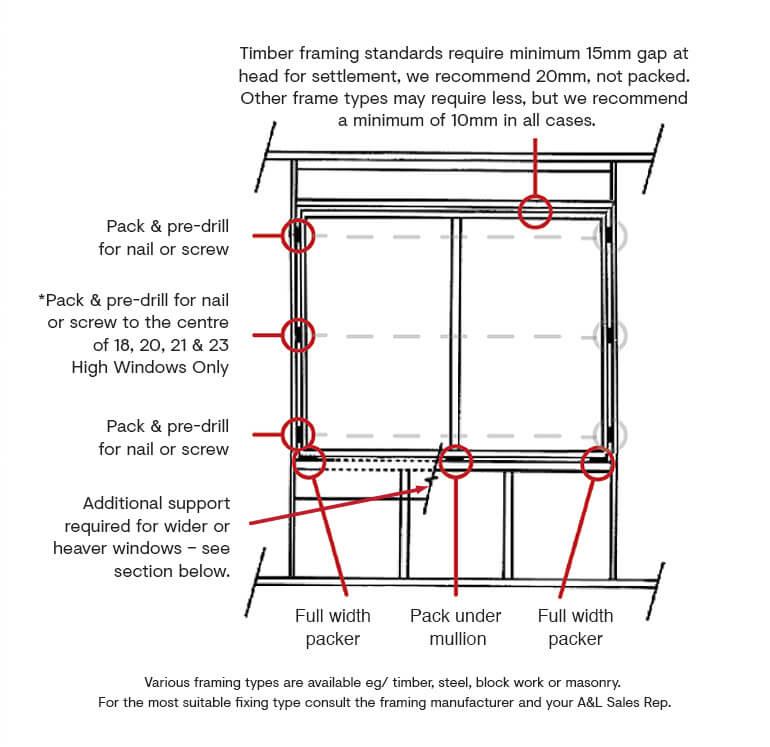
- Firstly, place the spirit level on the bottom plate, and pack level where the product will sit. If packers are required, fix them into position with brad nails so they don’t move around.
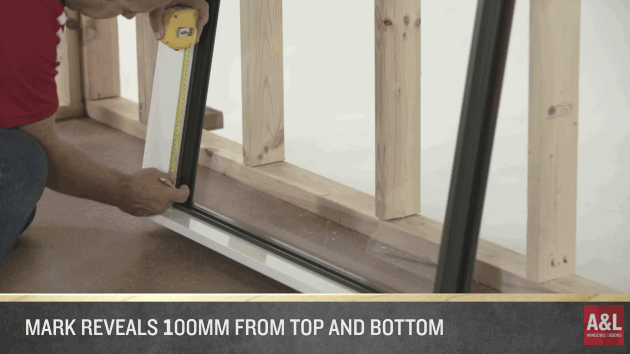
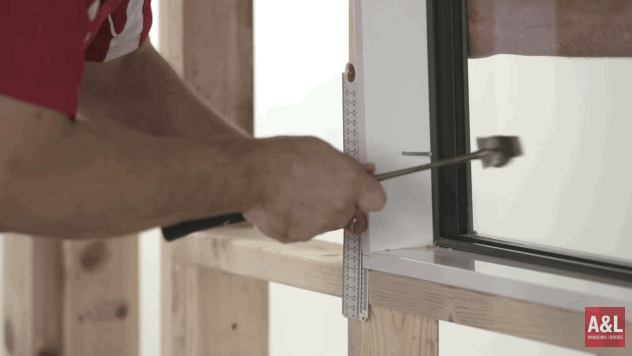
- Place a mark on the reveal of both jams 100mm from the top and 100mm from the bottom.
- Pre-drill a hole at each mark with a 3mm drill bit.
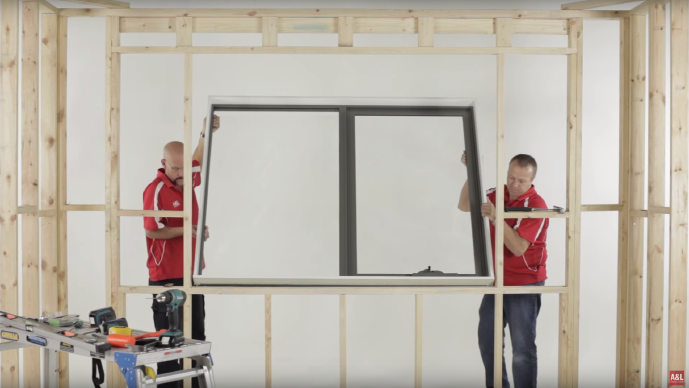
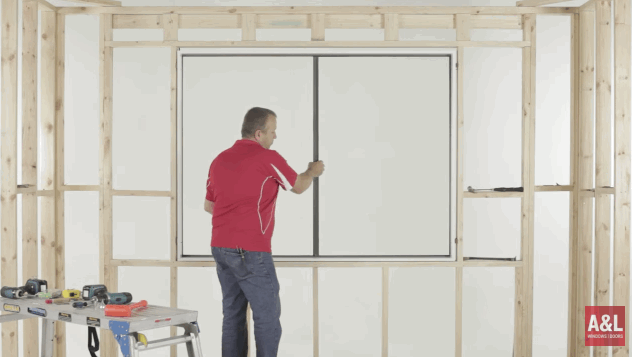
- Place the product into the opening from the outside.
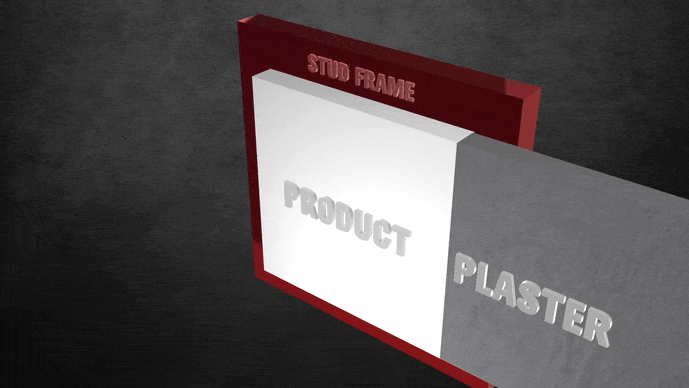
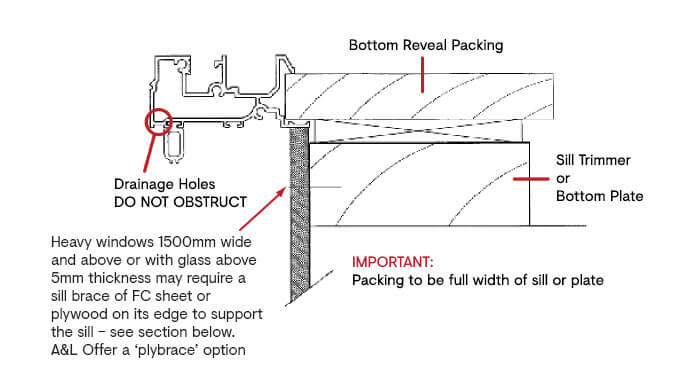
- A standard installation allows for 10mm of plaster on the inside, so using a 10mm packer or the thickness of a simple brickies ruler as a guide, overhang the reveal back into the house by 10mm.
- Fix a nail into the stud through the pre-drilled holes nearest the sill on both sides of the product. Do not nail them in all the way.
- Fix a nail into the stud through the pre-drilled hole into the top of the reveal. Again, do not nail them in all the way. Repeat on the other side of the product.
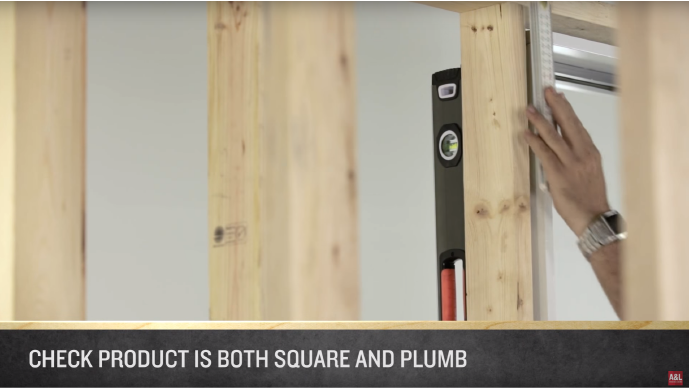
- Holding your spirit level against the jamb, check that the product is both square and plumb.

- Measure the product diagonally in both directions to ensure it is square. Ideally you want both measurements to be the same, but within a couple of millimetres is okay.
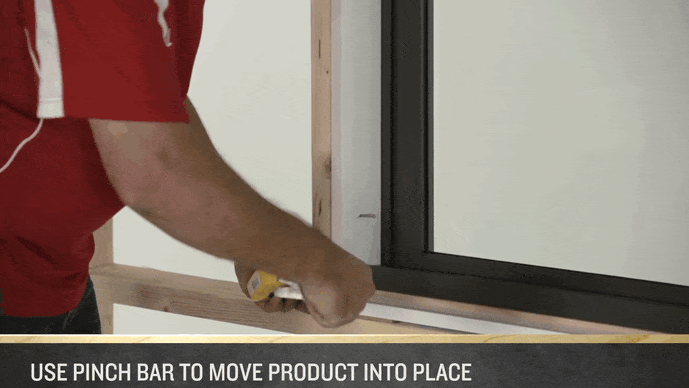
- Use the pinch bar to gently move the product into the correct position if required.
- Before packing and fixing off, it’s a good idea to check how the product is operating.
- Slide the sash open and closed again to ensure it is functioning properly.
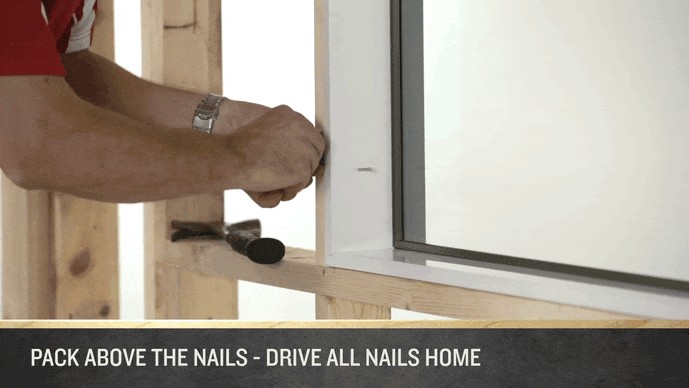
- Once you’re happy with the product’s positioning, pack between the reveal and the stud above the nails, and drive all the nails home.
- For taller products, you may need to add additional fixings along the reveals on the jamb. If so, follow the same procedure of pre-drilling, packing and fixing ensuring the reveals remain plumb.
Installation Snapshots:
Learn more.
If you’re considering which style of windows to incorporate into your next build, let us be your guide. From awning and sliding windows, to bifold and corner windows, A&L’s diverse range of windows are durable, stylish and manufactured right here in Australia. Learn more about our family of products.