Locally made
All A&L windows and doors are designed to meet high performance standards. To ensure your A&L products remain in perfect condition and function accordingly, please follow these simple care and adjustment tips. Failure to adhere to the care and maintenance instructions will void your warranty.
Ensure the sliding door track has been thoroughly cleaned/vacuumed to remove any impurities that could result in damage and operational defects.
Do not operate the door if it is scraping on the track, as this will cause scoring and possible failure of the rollers (see Roller Adjustment below).
If roller adjustment is required, follow the simple procedure below, or jump on our YouTube Channel to view the instructional video.
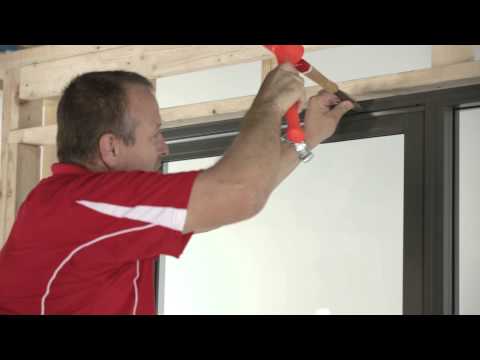
Slide the door to its almost closed position. Check that the door is plumb to its frame and clear of the track.
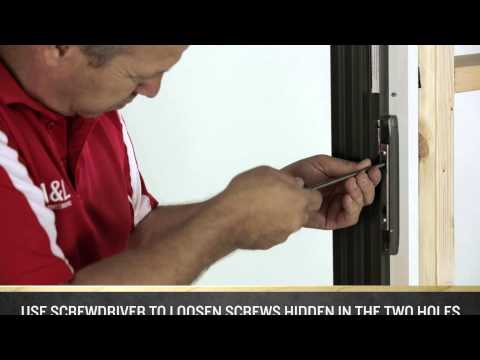
If necessary one or both rollers may be adjusted by turning one or both of the adjustment screws clockwise to raise the door, and anticlockwise to lower. This adjustment can only be performed with all the weight of the door taken off the roller by holding the door panel jamb clear of the track.
Door threshold/window sills must not have or be used as construction supports for scaffolding or as unprotected barrow ramps.
Our sliding windows are designed to allow water to drain from holes beneath the track. Ensure the drainage holes are clear, so that the window can function accordingly.
Sash slides on our windows and doors are height adjustable. To adjust the height on one or both of the slides, remove them and rotate higher or lower.
VIEW OUR VIDEO GUIDES BELOW FOR STEP BY STEP ADJUSTMENT
To keep your windows and doors looking and functioning at their best, follow these simple maintenance tips. Maintenance is essential to ensure the original aesthetic and performance of your windows and doors.
Always store windows and doors upright in a dry area out of exposure from the weather.
Timber entry frames, side lites and door panels can be irreparably damaged from being exposed to the weather, defects due to moisture content which falls below 10% or for moisture content which exceeds 15% are not covered by your warranty.
If storage of timber windows and doors is likely to exceed 14 days, it is recommended to seal all surfaces and edges beforehand to protect the product.
Aluminium windows and doors with unprimed reveals should be primed before installation into a cavity brick construction to avoid moisture absorption. If storage is likely to exceed 14 days, it is recommended to seal all surfaces and edges beforehand to protect the product. Window reveals which have not been protected from the elements within two weeks of being delivered to site will not be covered by your warranty.
Do not store or move frames in a way that alters the square positioning of the frame.
All protective wrapping or films should be removed within 90 days of delivery. This includes any plastic wrap, bubble wrap, panel wrap and other packaging materials. Excessive time on the product can lead to the staining of glass and aluminium.
Protect window and door surfaces from mortar, brick cleaning acid and plaster. Wash away any spillage immediately or permanent damage will result. Failure to protect windows from any mortar, brick cleaning acid or plaster will void the warranty.
Your aluminium windows and doors require cleaning to protect your investment, minimise the effects of weathering and maintain your warranty.
It is not recommended to paint over aluminium frames — doing so will void your warranty and does not offer the durability of the initial finish. It can also be a tricky job involving either disassembly of the doors or painting with the glass and seals in place. If painting with glass and seals in place, it can be difficult to avoid overspray getting on the components. Painting the frames could also affect the operation of your doors. In the event of minor scratches or marks on your initial finish, touch up paint is available.
Your windows and doors should be wiped down with a mixture of warm water and non-abrasive, pH neutral detergent. You can use a soft cloth, sponge or a soft natural bristle brush. Rinse thoroughly after cleaning to remove any residue and dry with a soft cloth.
The tracks in which sliding windows or doors move should be cleaned at the same time. To maintain the performance of your window and door tracks, it is recommended that you vacuum the tracks on a regular basis. In addition, treat the tracks yearly with a light dry lubricant silicone spray. This will maintain a smooth sliding action.
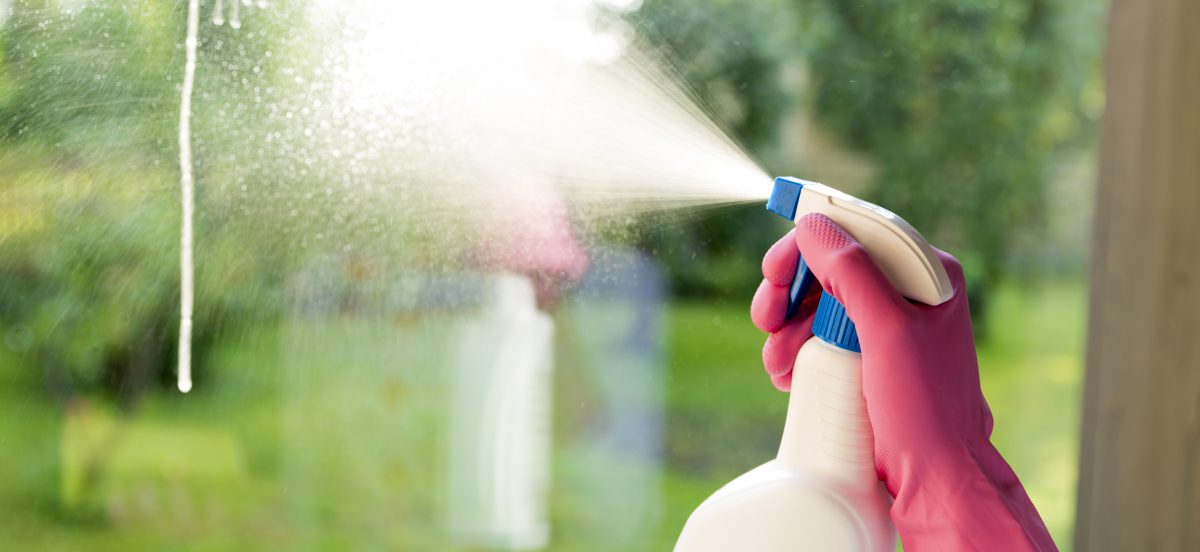
When washing your windows and doors, never direct powerful streams of water directly at the window(s) or door(s). To gently clean and avoid the risk of water leaking into your home, use the sprinkle setting on your hose’s nozzle and direct the water downwards.
Do not use solvents or caustic or abrasive cleaners on powdercoated finishes. For anodised finishes only: if the above tips for cleaning are not successful, a mild solvent such as kerosene or mineral turpentine can be used with care.
City – At least every 6 months
Rural – At least every 3 months
Coastal – At least every month. Products installed in sheltered areas need to be cleaned more often as salt or other pollutants can build up without being washed away by rainfall.
Timber entry frames, side lites and door panels should be sealed within two weeks of delivery. Paint, varnish or seal both faces and edges, top and bottom (i.e. hinged doors need to be finished on both faces of the door, the sides and the top and bottom). Defects due to moisture content which falls below 10% or for moisture content which exceeds 15% are not covered by your warranty.
Generally, paint, sealing, and stain manufacturers will specify that you should give timber a light sand before finishing. Always refer to the paint, sealing and stain manufacturer’s information. The surface should be prepared with appropriate sandpaper.
We recommend that timber entry frames, side lites and door panels exposed to sunlight be painted or stained with light reflective colours as dark colours absorb light and heat. Using dark colours will cause a drying effect and could cause the product to warp over time.
The use of a light-coloured topcoat is essential. Your paint supplier or paint manufacturer can advise you on the light reflective value (LRV) of the colour you have selected. The higher the LRV the less heat the material will absorb and the longer the expected life of the paint finish.
Black has an LRV of approximately 5. White has an LRV of approximately 95. Choosing paint colours with an LRV of greater than 50 is a wise choice.
Also, using different colours on either side of the door or window (exterior/interior) will cause uneven heat and moisture absorption, particularly for products in exposed applications, and may cause the door or window to warp. The end grain of timber absorbs the most moisture, consequently failure to paint or stain all sides, including top and bottom and edges, will void the warranty.
Do not leave your timber windows and doors in the weather prior to the application of a paint system. Un-primed timber windows and doors must be primed before painting. Follow the paint manufacturer’s instructions for specific instructions. If painting, the timber can be finished with water-based or oilbased paints. Follow the paint manufacturers recommendations on specific paints.
Semi-gloss or satin finishes are recommended on timber products to reduce the effect of timber grain show through. If staining, the surface of the timber must be scuffed with 120 or 180 grit sandpaper or other non-ferrous scourer pad to ensure good adhesion of the stain.
Extra care must be taken when painting to ensure that hardware and seals are not painted over by the paint finish, as this will impact the products operation.
For ongoing maintenance of timber, wipe down regularly with a damp cloth.
The first possible stage in which glass can become dirty is usually during construction. Debris such as masonry dust, welding, cement particles, paint, and tape residue can come into contact with the glass.
Keep welding and angle grinders away from glass during the construction process.
Cement and concrete are highly alkaline and can cause irreparable damage to the glass surface. All trades must take due care whilst working near glass. At the time of construction, suitable precautions must be taken to minimise any damage to the glass surface.
The ongoing care and maintenance of glass is important for its performance and will also ensure your warranty is maintained.
Windex® Multi-Surface Cleaner (other Windex® branded varieties may be used but may lead to problematic streaking of the glass).
For a natural alternative, a mixture of one-part vinegar with ten parts water can be used in place of store-bought cleaners. In addition to the above products, commercially available vinegar-based glass cleaners have generally demonstrated an ability to provide a clean, streak free glass surface.
Remove any dirt or debris from the glass as soon as it is visible.
To prevent streaking, stop wiping when the glass is almost dry and there is a uniform residue of moisture left on the glass surface. The residue will quickly evaporate leaving a clean surface.
Low E coated glass has a very thin metal coating on the interior glass surface. This hard and durable coating gives the product its improved thermal insulation and solar control performance compared to ordinary clear glass. The coated surface of the glass does clean differently to ordinary glass and these guidelines are recommended for the most appropriate hand cleaning results. Coated Low E glass can be cleaned the same as uncoated glass, however, do not use a squeegee on the coated (interior) surface.
To prevent streaking, stop wiping when the glass is almost dry and there is a uniform film of moisture left on the glass surface. The moisture will quickly evaporate leaving a clean surface.
The cleaning of toughened glass requires special consideration. The glass surface on the opposite side to the Safety Compliance Stamp may, as a consequence of the manufacturing process, have what’s called ‘pickup’ on the surface. ‘Pickup’ is a deposit of very small particles of glass which are fused on the glass surface. It’s important during the cleaning of toughened glass to not dislodge these particles, otherwise scratching of the glass surface may result.
We recommend you only use a soft cleaning cloth on toughened glass. It is suggested that professional cleaners consult with their suppliers as to the suitability of available cleaning equipment, materials, and methods before attempting to clean toughened glass.
Occasionally spot cleaning may be required to remove stubborn dirt or foreign materials which adhere to the surface. Spot cleaning products work to remove markings from grease, oil, tape adhesive, and crayons or other waxy materials, as well as paint and rub-off marks from plastics.
While cleaning ensure jewellery and watches are removed and gloves are worn to avoid scratching the surface of the glass. Scratches that occur from foreign objects like these will be permanent and are not repairable.
Other recommended spot cleaning products: methylated spirits, available from supermarkets and hardware stores.
It is advised to avoid modifying glass by the addition of a film, tint, privacy, or any other finish not authorised by us. These modifications are excluded from warranty coverage. This is because certain types of window films can cause damage to certain types of glass. Tinted films increase the thermal stress on the glass, which can lead to cracks.
Clean with warm soapy water or a mild detergent and a soft cloth. Rinse with water and dry with a soft cloth to avoid water marks.
If tea staining (brown discolouration of the surface) does occur, this is not a defect – it will occur naturally in coastal and industrial environments. Regular cleaning will reduce the prevalence of this issue. Tea staining can be removed with a mixture of Ajax, warm water and baking powder – brush with a toothbrush until clean. After cleaning, application of products like CRC Marine 66 or Inox for Marine will reduce this occurrence.
Clean with warm soapy water or a mild detergent and a soft cloth. Rinse with water and dry with a soft cloth to avoid water marks.
Clean with warm soapy water or a mild detergent and a soft cloth. Rinse with water and dry with a soft cloth to avoid water marks. Plated metal hardware is not recommended for extreme coastal conditions, we recommend a powder-coated option.
The operational life of products is increased if light machine oil is applied to moving parts, hinges, slides, etc.
Powdered graphite should be applied to the keyway in lock barrels, with a squeeze puff applicator.
City – At least every 6 months.
Rural – At least every 3 months.
Coastal – At least every month.
In the case that screens can’t be removed, gently spray with water and brush lightly with soft bristle brush until clean. When washing your screens, never direct powerful streams of water directly at the product. Always use the sprinkle setting on the nozzle of your hose to avoid the risk of water leaking into your home.
City – At least every 6 months.
Rural – At least every 3 months.
Coastal – At least every month.
PLEASE NOTE
When washing your windows and doors, never direct powerful streams of water directly at the product. Always use the sprinkle setting on the nozzle of your hose, to gently clean your windows and doors, without the risk of water leaking into your home.

Check out our guide for keeping your windows and doors in top condition.
Download now